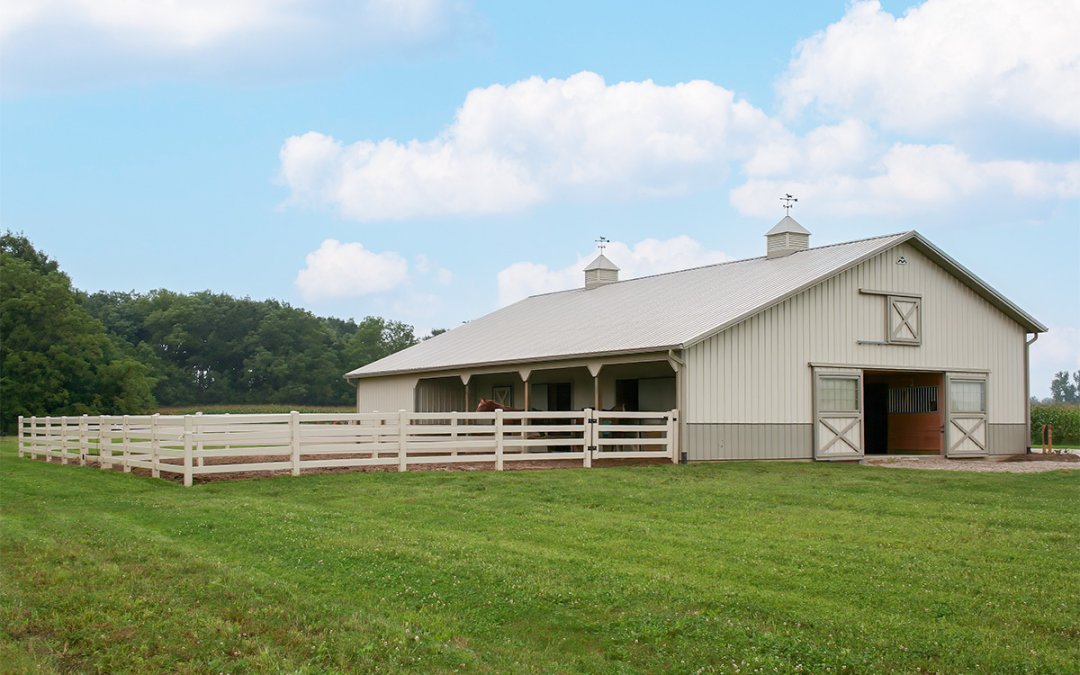
How Much Does It Cost to Build a Horse Barn?

How Much Does It Cost to Build a Horse Barn?

When we’re asked how much it costs to build a horse barn, the answer usually starts with a range. Most of the post-frame equestrian buildings we design and construct, including horse barns, average between $35 and $50 per square foot. That range gives a starting point, but it does not tell the full story. Ultimately, horse barn cost depends on how the building is designed around your operation. Size, stalls, feature choices, and site conditions all move that number up or down.

Building Size and Horse Barn Construction Cost

The overall footprint of the barn is the first driver of horse barn construction cost. A 2-stall barn and a 10-stall barn are not just different in size. They are built to support different daily uses.

While larger buildings may cost more overall, they are often more cost-effective per square foot than smaller buildings. Smaller barns often land closer to the higher end of the $35 and $50 per square foot range, while larger layouts are often near the middle.

This is because mobilizing crews and equipment is a one-time step. Once those are in place, adding square footage becomes more efficient. 

Site Preparation Costs for Horse Barns

Site preparation is one of the widest varying factors of a horse barn’s construction costs. Soil conditions, drainage, and access to the building site all influence what needs to happen before construction begins. Grading, compacting, and establishing a stable base are necessary for long-term performance.

Stall Count and Configuration

The number of stalls and how they are arranged directly influence the final cost to build a barn. A simple row of stalls creates a different structure than a center aisle layout with doors, openings, and circulation space. Wider aisles, additional access points, and specialized stall configurations all affect the building’s framing and overall footprint. Dutch doors, sliding doors, and custom stall fronts are not the same price.

As the stall count increases, the barn often expands to include the spaces that support daily routines, which adds to the total square footage.

Interior Spaces & Features That Increase Cost

horse barn features

Most horse barns we build include more than stalls. Tack rooms, feed rooms, wash bays, and grooming areas all expand how the building is used and how the interior is framed and finished. Hay storage adds another layer of cost depending on how it’s handled. A loft above the stalls requires different framing and floor loading than ground-level storage, and a separate hay structure adds square footage and its own foundation work.

Bringing water, electricity, and drainage into a barn turns it from a basic structure into a fully functioning facility. Water lines, electrical service, and drainage all require coordination with the building layout and the site itself.

Optional customizations, such as specialty doors, windows, and cupolas, add to the total as well. 

Post-Frame Construction and Long-Term Value

The $35-to-$50-per-square-foot range is tied directly to post-frame construction and how it performs over time.

We build with Perma-Column foundations, which keep wood out of the ground and provide a consistent base across varying soil conditions. That consistency protects the structure from moisture-related issues and helps control long-term maintenance costs.

Our engineered columns and hand-built trusses are designed for each building rather than pulled from a standard kit. That allows the structure to match the barn’s layout and use without overbuilding or underbuilding.

We also design for natural ventilation, which reduces the need for additional mechanical systems while improving airflow inside the barn. That affects both the initial build and how the space performs day to day.

Why Post-Frame Construction Costs Less Over Time

Post-frame construction offers cost advantages that other building methods don’t. Traditional stick-built barns require continuous foundation walls and extensive interior framing. Concrete block or masonry barns need thick walls and reinforced foundations. Both approaches add material and labor costs that post-frame construction avoids.

Post-frame barns use fewer materials to achieve the same structural performance. Without load-bearing walls, you get an open, flexible interior space without the cost of additional structural support.

The construction process itself moves faster than traditional methods. Pre-engineered components arrive ready to install rather than being built piece by piece on site. That reduces labor hours and shortens the construction timeline, which keeps costs predictable.

Long-term maintenance costs stay lower as well. Perma-Column foundations resist moisture and settling that can affect other foundation types. Metal roofing and siding require less maintenance than traditional materials. Natural ventilation systems need no mechanical components to maintain or replace.

These advantages are not add-ons. They are part of how post-frame barns are built, and they play a role in keeping costs predictable across different projects.

Planning Your Horse Barn

Whether you’re planning a small barn for personal horses or a larger facility for your equestrian operation, understanding these factors gives you a clearer starting point for your project. For more guidance on designing and planning equestrian facilities, see our complete guide to post-frame horse buildings. You can also explore the full range of features and customization options available for horse stables and stall barns.

If you want to talk through a project, call us at (260) 565-3274, reach out online, or use our cost estimator to get a starting point.

How to Plan a Horse Barn Layout That Works for Humans & Horses Every Day

How to Plan a Horse Barn Layout That Works for Humans & Horses Every Day

Planning a horse barn layout requires thinking through how horses, handlers, and equipment will use the space daily. A custom post-frame equestrian building starts with those routines. A builder familiar with equestrian structures can help turn your ideal use into a building plan.

Horse Barn Layout Planning Starts with Daily Routines

When we talk through a horse barn layout, we begin with scale and routines:

  • How many horses will live in the barn?
  • How often are horses moving in and out, and what is their traffic pattern?
  • Will you handle most chores alone, or will several people move through the barn at once?
  • Do you teach lessons, board horses, or run a breeding program?

The answers can help decide whether horse barn chores end up flowing smoothly or feeling cramped. A small private family barn for a few horses may work well with a compact shed-row or simple center-aisle plan. A lesson or boarding barn needs more controlled movement, more storage, and cleaner separation between horse traffic and supply traffic. Commercial operations may also need weather-protected access to an arena, wash bay, tack room, or office space.

Center Aisle, Shed Row, or L-Shaped Horse Barn Plans?

Most of our horse barn layout conversations start with configuration.

A center-aisle stall barn works well when you want a more enclosed barn, more stalls under one roof, and easier access during winter weather. It often makes sense for larger operations, lesson barns, and boarding programs because horses, tack, feed, and people all move through one main interior lane. This layout also pairs well with attached indoor arenas.

A shed-row barn often fits smaller footprints and private use. Stalls that open directly to the outside or to a covered overhang can simplify ventilation and daily turnout, but the layout also exposes more routines to the weather. For smaller properties or simpler use, it can still be a very practical option.

An L-shaped or courtyard-style layout can help when the site, turnout areas, or traffic patterns call for more separation. It can create a more protected approach to paddocks, wash areas, or trailer parking. It also works well when owners want to divide stall groups or separate more active traffic from quieter areas.

Stall Placement and Sizing Shape Horse Barn Layouts

Layout decisions can become more difficult once stall count enters the conversation. A standard 12′ x 12′ stall works well for many horses, but stall placement can matter as much as stall size. Larger breeds, mares with foals, or horses that need more room may call for larger stalls, different stall groupings, or more space near doors and handling areas.

A center-aisle barn with stalls on both sides of the aisle uses square footage efficiently, but it also makes aisle width more important because horses and handlers will share that central space. In a smaller private barn, a few stalls on one side with support rooms on the other may create a calmer flow.

We think through stall placement based on the workflows and routines that will happen every day. If the same horses go out first each morning, their stalls should sit near the most direct path to the main exit or turnout area. If the barn supports lessons, boarding, breeding, or training, stall layout may need to separate different kinds of traffic. A mare and foal setup may need quieter placement and easier monitoring, while a lesson barn may need stalls arranged for faster tacking, turnout, and movement during busy hours. Good stall placement reduces unnecessary steps and helps the barn operate smoothly when several things happen at once.

Aisle Width, Support Rooms, & Layout Details Shape Daily Use & Future Plans

A horse barn layout can look efficient on paper, but still create daily friction if aisles feel too tight or support rooms sit in the wrong places. Horses, handlers, wheelbarrows, bedding carts, and equipment all need room to move.

We typically treat 12’ as a useful minimum for horse barn aisles, but many barns benefit from 14’, especially when more stall traffic, equipment movement, or lesson activity runs through the space. The extra width gives handlers more room to lead horses, turn safely, muck stalls, and move feed or bedding without crowding parts of the barn. Using non-slip concrete is an important detail in aisle planning because wet boots, wash bay traffic, and daily cleanup can make smooth concrete a safety issue for horses and handlers.

Support room placement within a horse barn layout makes an impact, too:

  • A tack room near the main entrance often saves steps because riders and handlers use it constantly.
  • A feed room should stay easy to reach, but it should not force people to carry supplies through the busiest horse traffic in the barn.
  • Wash bays need enough hose access, drainage, and separation that water does not spread into tack, feed, or grooming areas.

Layout decisions also affect barn ventilation and visibility. A barn with poor airflow or dark work zones becomes harder to handle horses in safely and harder to keep dry. Door placement, openings, and room arrangement should help move fresh air through the barn and keep aisles, stalls, and work areas well lit. Wet zones need drainage that carries water away cleanly instead of pushing mud and moisture back into the traffic path.

Future growth potential belongs in the layout conversation, too. If you might add stalls, connect to an arena, or expand support space later, the first layout should leave a logical direction for next steps and future growth.

Horse Barn Layout Spotlight: Watcher’s Run Stables (36′ x 128′)

When Brad Boyer and his daughter Rachel planned Watcher’s Run Stables in Noblesville, Indiana, they needed to accommodate boarding, training, breeding, and riding lessons.

That level of use puts pressure on the layout. Multiple horses moving at once, regular stall cleaning, and steady traffic through the barn all need space to move without slowing each other down. 

Brad trusted Meyer Building as a partner who could think through the right horse barn layout for the way the facility would actually operate every day. 

Their layout uses a 36′ x 128′ center-aisle barn with 15 stalls and 14’ aisles. That width allows horses and handlers to pass, turn, and work without stopping each other during turnout and lesson hours when the barn is busiest.

The barn also connects directly to a 86′ x 176′ indoor riding arena. Horses and riders can move between spaces without going outside, which keeps routines consistent and reduces extra movement across the property.

Plan Your Horse Barn Layout With Meyer Building

If you are ready to talk through the right horse barn layout for your property, call (260) 565-3274 or reach out online to begin the conversation. You can also try the Meyer Building Cost Estimator tool for a ballpark estimate to start shaping your horse barn budget.

Multi-Purpose Ag Shop Design: One Building for Every Need on the Farm

Multi-Purpose Ag Shop Design: One Building for Every Need on the Farm

A multi-purpose ag shop design should be able to handle equipment storage, repairs, and daily farm work within the same footprint. On many farms, an agricultural building often needs to have room for more than one person doing more than one thing at the same time, across more than one generation.

Popular Multi-Purpose Ag Shop Design Choices

The combinations we see farmers build most often include:

A heated service bay paired with cold storage: Many farmers opt for two-thirds cold storage for machinery and equipment and one-third heated shop for the repair work that can’t wait for spring.

A walled wash bay: Farmers often choose to put a wall between the wash bay and the main shop to keep moisture away from tools and equipment.

Office and bathroom accessible separately from workspace: This design choice allows seed reps, delivery drivers, and service technicians to reach the office without walking through the shop.

Mezzanine: A mezzanine above the office or bathroom adds an upper level for seasonal items, records, and parts that don’t need to live on the floor.

How Door Placement, Bay Width, & Zoning Support Daily Use

Door Placement for Heat Retention & Traffic Flow

While it makes sense to choose door locations based on how equipment approaches the building, two other factors are worth considering. Larger doors positioned on the south or east side lose significantly less heat than doors facing the prevailing north and west winds. A walk door next to every machinery door lets people move in and out without opening the large door in cold weather.

Endwall Door Width & Work Space

A good rule of thumb for endwall door sizing: the door should be no wider than half the building width. A 20-foot door in a 40-foot building leaves 10 feet of usable work space on each side of the repair bay. Go wider than that and the benches, tools, and work areas that make a shop functional start to disappear.

Choosing Overhead Doors for Maximum Usable Ceiling Height

An 18-foot ceiling with a standard overhead door typically yields a 16-foot opening once the track and hardware are accounted for. A hydraulic door in the same ceiling gives close to the full 18 feet of clearance. When open, a hydraulic door can offer covered exterior workspace along the full width of the opening. For operations that need maximum clearance or want that covered staging area outside, hydraulic doors are worth considering.

Zone Separation in a Multi-Purpose Ag Shop

Clear zone separation keeps functions from drifting into each other over time. The clean side stays clean and the dirty work stays contained. Placing parts storage next to the service bay but out of the equipment traffic path is one example of separating areas that allows multiple people to work at the same time, while promoting safety.

Sizing a Multi-Purpose Ag Shop

In a shop that handles multiple uses, size for the equipment first, then fit the rest of the layout around it. Start with your widest equipment to determine width and your tallest to determine door height. 

Combines tend to drive the height requirement while planters drive the width. Cabs, exhaust stacks, and bin extensions can add clearance needs beyond what the base machine requires. 

Get actual measurements of your equipment or pull specs from the dealer, including anything you plan to buy in the next five to ten years. Your post-frame builder can help you translate those numbers into a building that fits the full operation.

Place Utilities Around Where Work Happens

A 200-amp, 220-volt service is the practical minimum for a modern farm shop. Beyond panel size, placement matters as much as capacity. Placing outlets where wires are easiest to run often results in extension cords across the floor as permanent fixtures. Outlets should be at workbench height every four to six feet along the bench, drops at equipment service locations, and 220-volt receptacles near the welder and compressor. Running air lines in pipe along the walls with drops at the bays where equipment gets worked on is one of the details farmers consistently say was worth planning for.

Plan a Multi-Purpose Ag Shop With Meyer Building

Meyer Building designs custom post-frame agricultural buildings for the way farms actually work. We help you think through equipment clearance, shop zones, door placement, utilities, and future growth so the building supports your operation for years to come. Ready to start planning? Contact us or try our Cost Estimator to explore size and feature ranges before your first conversation.

Horse Arena Size: How to Choose the Right Equestrian Riding Arena Dimensions

Horse Arena Size: How to Choose the Right Equestrian Riding Arena Dimensions

Determining the right horse arena size is more about answering a practical question than a construction question: how much space do your horses and riders need to ride safely and train well? A custom post-frame equestrian building fits the way you ride and train horses day after day. Sizing the arena based on rider count, lesson traffic, and the work you do inside the building helps determine the best dimensions for your building.

How to Choose Horse Arena Size Based on Daily Use

When we talk through arena size, we start with real daily use. A personal family arena for one or two riders can often work at a smaller scale than a lesson or boarding facility. But you still need enough room to ride comfortably, keep a consistent track on the rail, and circle without crowding.

Lesson programs, boarding barns, and training facilities need more breathing room because the ring becomes a traffic lane. More riders mean more passing and more chances for someone to get boxed in.

A useful planning benchmark we use is to count the maximum number of riders you expect during your busiest hours, not the average day.

post-frame horse riding arenas

Horse Arena Dimensions by Discipline

After we understand daily use, the next question is what type of riding will drive the space.

  • Western & Reining: A common starting point is 100′ x 200′, with 120′ x 240′ offering more comfortable room for patterns and stopping distance.
  • Dressage: A smaller dressage court runs about 66′ x 132′, while a standard court is around 66′ x 198′.
  • Hunters & Jumpers: Many programs plan 100′ x 200′ or larger for course flexibility, approach lines, and safe turns.

These are planning ranges, not strict rules. As we work through rider count and traffic flow, the final size may grow or shrink from there.

For general riding and recreational use, 60′ x 120′ works well for flatwork, casual schooling, and light multi-use riding. Once you add multiple riders, mixed disciplines, or lessons, many facilities move toward 80′ x 160′ or larger.

Riding arena width controls how safely riders can pass, how much usable track you have on the rail, and whether the arena feels tight when more than one horse is moving forward at speed. Clear-span post-frame construction keeps interior posts out of the riding area, preserving open space and sightlines.

Indoor Riding Arena Height Requirements

Floor dimensions draw a lot of attention, but wall height also impacts how an equestrian arena rides and feels.

For many indoor arenas, 14 feet is a common minimum starting point for basic flatwork and general riding. Many owners choose 16 feet or more because extra height makes the space feel more open and provides better room for lighting, fans, and speakers without crowding the riding envelope. If you jump, height matters even more. For jumping programs, we typically recommend planning for 16 feet or higher.

Horse Arena Layout Details That Affect Safety & Riding

post-frame equestrian riding arena building

An equestrian riding arena can meet minimum dimensions on paper and still feel tight in real use. Horses need room to move forward confidently, and riders need space to set up lines or patterns without rushing every turn. The right size lowers stress and creates a calmer rhythm for everyone.

Where horses enter and exit the arena affects how much usable space you actually have on the rail. An entry point that dumps directly onto the working track creates conflict during busy hours. We plan entry placement as part of the overall size conversation so the full footprint works the way you need it to. The same thinking applies to how horses stage and move during lessons or training sessions. Dead space in the wrong spot costs you more than the square footage suggests.

Riding Area Spotlight: Watcher’s Run Stables (86′ x 176′)

watchers run stables noblesville indiana

When Brad Boyer and his daughter Rachel planned Watcher’s Run Stables in Noblesville, Indiana, they weren’t building a personal riding space. They were building a business for boarding, training, breeding, and riding lessons. 

Brad looked at four different building companies before choosing Meyer Building. He needed a partner who could think through the right arena dimensions for the way the facility would actually be used.

The Boyers chose an 86′ x 176′ indoor arena so multiple riders could use the building at the same time without crowding each other. The goal was daily function and safe traffic flow.

Plan the Right Horse Arena Size with Meyer Building

If you are ready to talk through the right horse arena size for your property, call (260) 565-3274 or reach out online to begin the conversation. You can also try our Cost Estimator tool for a ballpark estimate to start shaping your budget.

Pool House Buildings for Midwest Backyards

Pool House Buildings for Midwest Backyards

Pool house buildings today are more versatile than ever. What do you need from yours? A dedicated changing room and bathroom so nobody’s dripping through the house? Covered outdoor space for shade and seating? Storage for equipment, outdoor furniture, and boats or RVs? Maybe a kitchenette or entertaining area for the days when the whole neighborhood shows up. A well-planned post-frame accessory structure or residential building can give you all that and more in a layout that fits the way your family uses it.

Pool House Buildings for Midwest Backyards

Construction Options for a Pool House Building

Many homeowners planning a suburban or rural custom pool house assume traditional wood-framed construction is their only option. Post-frame construction costs less, builds faster, and provides open-span spaces to align with any layout customizations you desire.

Post-frame uses large structural posts anchored into a concrete foundation instead of a continuous wood frame. It’s the same method used for agricultural and commercial buildings, and the advantages carry over directly. Clear-span framing keeps the interior open without load-bearing walls or columns interrupting the floor plan, and foundation systems like Perma-Column® keep wood out of the ground, which is a meaningful advantage next to a pool.

Planning Your Pool House Building Layout

With a wide-open interior to work with, how you divide a post-frame pool house’s space depends on how you want to use the building day to day and on special occasions.

pool house building layout
Large overhead doors can make it easy and practical to pull in a boat, RV, or other equipment and still have room for pool tools, lawn gear, and seasonal storage alongside them. 
pool house building overhead doors
pool house building storage
Covered porches on one or more sides extend the usable footprint without adding enclosed square footage, putting shade and seating right where you need it next to the water.
post-frame pool house building
Inside, bathrooms and a full kitchen can be built into their own rooms along one wall to leave the rest of the floorplan’s living areas open for family gathering and recreation space. Radiant floor heat systems keep pool house floors comfortable year-round without taking up wall or ceiling space, so you have more room for other uses.
post-frame pool house building kitchen
Upper-level lofts add a second level of gathering space without expanding the building’s foundation. A loft area can serve as a recreation room, guest living quarters, or overflow seating with a view of the main floor below.
post-frame pool house building interior

Pool House Building Size and Cost

Most residential pool house buildings run from 30’x40′ to 40’x60′ and larger. The right size depends on what you want inside and how you plan to use it year-round.

Meyer Building designs each pool house building to the specific project, so pricing reflects your scope rather than a standard package. Post-frame construction typically starts from $35 to $50 per square foot, with insulation adding approximately $35 per square foot and additional costs for finishes, mechanical, electrical, and plumbing.

Our online Cost Estimator tool is a good starting point for a ballpark figure before you get into design decisions.

Permitting for Pool House Buildings

Permitting is where suburban pool house projects often slow down or stall. Setbacks from property lines and pool equipment vary by township and county. HOA review can add another layer. If you get the wrong information early, you could be moving the building location after plans are already in motion.

Meyer Building coordinates permitting, code compliance, and the documentation needed for approvals, so you’re not navigating that alone or finding out mid-project that something needs to change.

Pool House Building FAQs

Do you build pool house buildings in my area?
We service Northeast Indiana and Northwest Ohio. See our Service Area page for more information.

How long does it take to build a post-frame pool house?
Timelines vary by size, site conditions, and permitting. Post-frame construction moves faster than traditional construction once the project is approved and underway.

Can I add RV or boat storage to a pool house building?
Large overhead doors and clear-span framing make it straightforward to incorporate vehicle and equipment storage into the same building footprint.

Building Your Pool House with Meyer Building

Meyer Building designs and builds custom pool house buildings across Northeast Indiana and Northwest Ohio. With general contracting capabilities, we can handle design, permits, site prep, foundation, and construction from start to finish, so you’re not coordinating between contractors or explaining the same decisions twice.

If you’re ready to talk through what you want in a pool house building, call (260) 565-3274, contact us online, or explore our recreational and entertainment buildings for more possibilities.