Multi-Purpose Ag Shop Design: One Building for Every Need on the Farm

Multi-Purpose Ag Shop Design: One Building for Every Need on the Farm

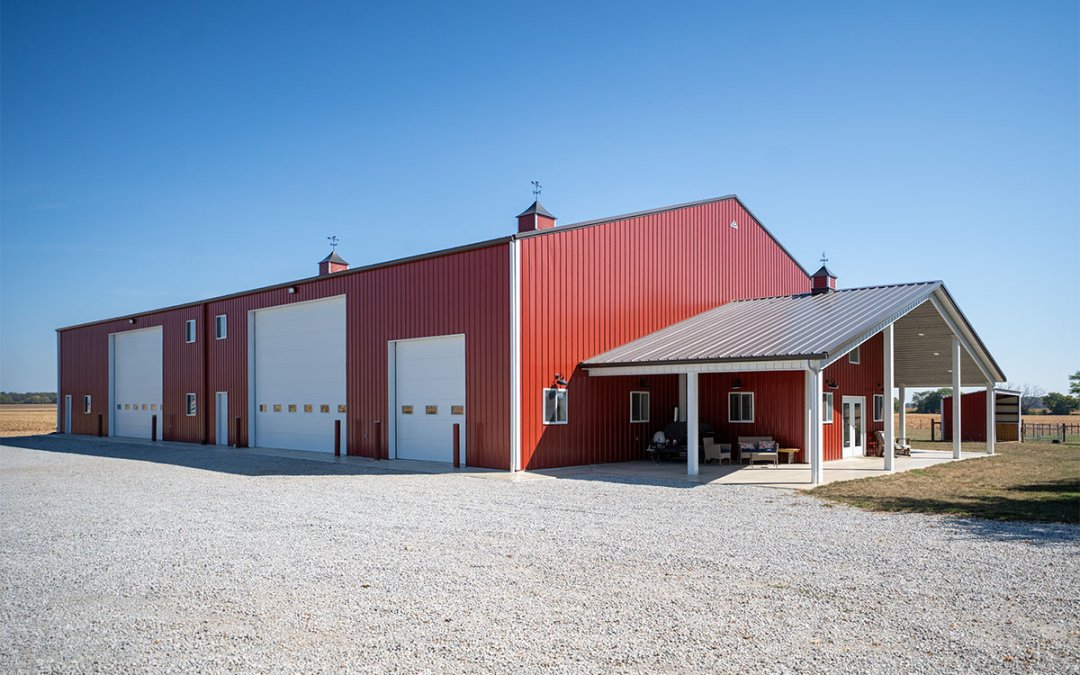
A multi-purpose ag shop design should be able to handle equipment storage, repairs, and daily farm work within the same footprint. On many farms, an agricultural building often needs to have room for more than one person doing more than one thing at the same time, across more than one generation.

Popular Multi-Purpose Ag Shop Design Choices

The combinations we see farmers build most often include:

A heated service bay paired with cold storage: Many farmers opt for two-thirds cold storage for machinery and equipment and one-third heated shop for the repair work that can’t wait for spring.

A walled wash bay: Farmers often choose to put a wall between the wash bay and the main shop to keep moisture away from tools and equipment.

Office and bathroom accessible separately from workspace: This design choice allows seed reps, delivery drivers, and service technicians to reach the office without walking through the shop.

Mezzanine: A mezzanine above the office or bathroom adds an upper level for seasonal items, records, and parts that don’t need to live on the floor.

How Door Placement, Bay Width, & Zoning Support Daily Use

Door Placement for Heat Retention & Traffic Flow

While it makes sense to choose door locations based on how equipment approaches the building, two other factors are worth considering. Larger doors positioned on the south or east side lose significantly less heat than doors facing the prevailing north and west winds. A walk door next to every machinery door lets people move in and out without opening the large door in cold weather.

Endwall Door Width & Work Space

A good rule of thumb for endwall door sizing: the door should be no wider than half the building width. A 20-foot door in a 40-foot building leaves 10 feet of usable work space on each side of the repair bay. Go wider than that and the benches, tools, and work areas that make a shop functional start to disappear.

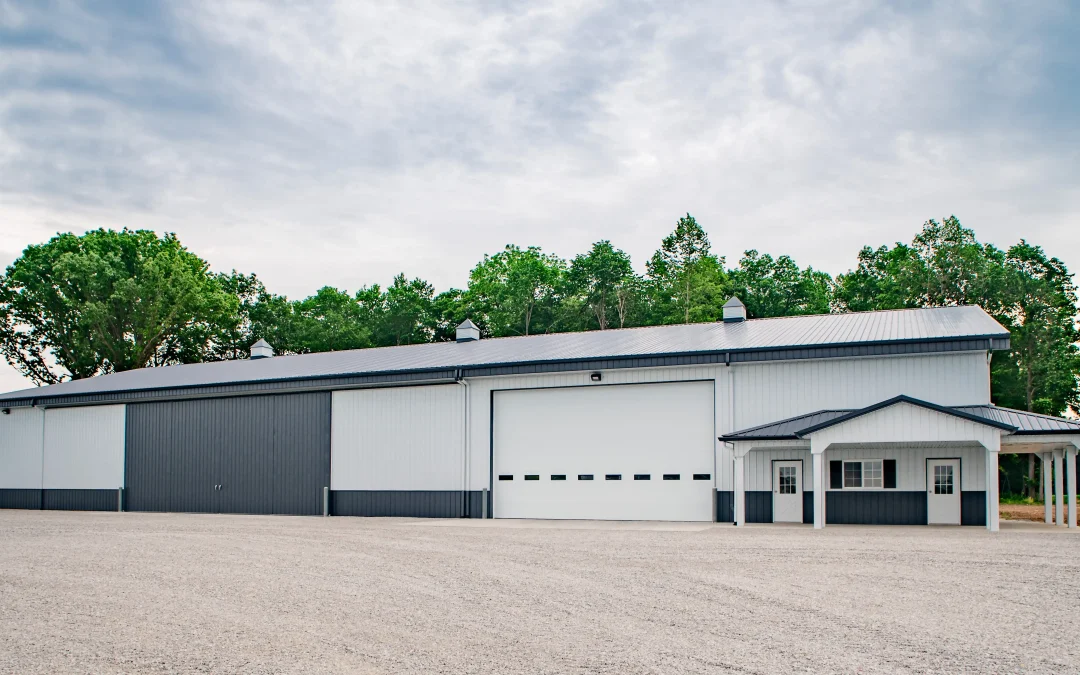
Choosing Overhead Doors for Maximum Usable Ceiling Height

An 18-foot ceiling with a standard overhead door typically yields a 16-foot opening once the track and hardware are accounted for. A hydraulic door in the same ceiling gives close to the full 18 feet of clearance. When open, a hydraulic door can offer covered exterior workspace along the full width of the opening. For operations that need maximum clearance or want that covered staging area outside, hydraulic doors are worth considering.

Zone Separation in a Multi-Purpose Ag Shop

Clear zone separation keeps functions from drifting into each other over time. The clean side stays clean and the dirty work stays contained. Placing parts storage next to the service bay but out of the equipment traffic path is one example of separating areas that allows multiple people to work at the same time, while promoting safety.

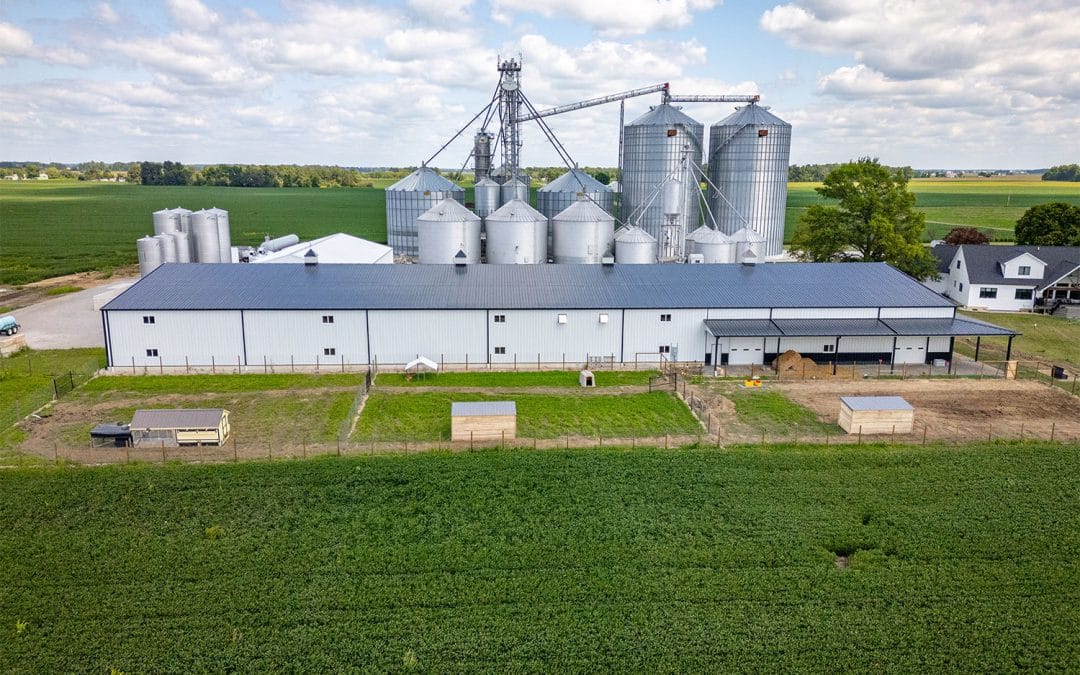
Sizing a Multi-Purpose Ag Shop

In a shop that handles multiple uses, size for the equipment first, then fit the rest of the layout around it. Start with your widest equipment to determine width and your tallest to determine door height. 

Combines tend to drive the height requirement while planters drive the width. Cabs, exhaust stacks, and bin extensions can add clearance needs beyond what the base machine requires. 

Get actual measurements of your equipment or pull specs from the dealer, including anything you plan to buy in the next five to ten years. Your post-frame builder can help you translate those numbers into a building that fits the full operation.

Place Utilities Around Where Work Happens

A 200-amp, 220-volt service is the practical minimum for a modern farm shop. Beyond panel size, placement matters as much as capacity. Placing outlets where wires are easiest to run often results in extension cords across the floor as permanent fixtures. Outlets should be at workbench height every four to six feet along the bench, drops at equipment service locations, and 220-volt receptacles near the welder and compressor. Running air lines in pipe along the walls with drops at the bays where equipment gets worked on is one of the details farmers consistently say was worth planning for.

Plan a Multi-Purpose Ag Shop With Meyer Building

Meyer Building designs custom post-frame agricultural buildings for the way farms actually work. We help you think through equipment clearance, shop zones, door placement, utilities, and future growth so the building supports your operation for years to come. Ready to start planning? Contact us or try our Cost Estimator to explore size and feature ranges before your first conversation.

Why Steel Matters in Your Post-Frame Building

Why Steel Matters in Your Post-Frame Building

When planning a post-frame commercial building, a major concern our clients have is how long it will last. Our buildings have consistently held up for many decades thanks to high quality building materials. Steel is like your post-frame building’s armor, shielding your investment from weather extremes and heavy use. That’s exactly why steel matters in your post-frame building. That said, not all steel is equal.

Premium Steel Panels: Proven Results

Meyer Building uses steel panels from McElroy Metal, a leading post-frame steel manufacturer in the nation. Backed by a non-prorated and labor-inclusive warranty, their 29-gauge, heat-treated, full-hard, high-tensile steel has a minimum yield strength of 80,000 PSI for high-strength resilience and dent resistance.

We specify Silicone-Modified Polyester (SMP) as our standard steel panel paint system for post-frame applications. SMP paint delivers durable, long-term value with strong UV protection, scratch and weather resistance, and a broad palette of 34 fade-resistant colors to complement existing structures and brand palettes.

For customers who want maximum color hold and chalk resistance, Kynar 500® polyvinylidene fluoride (PVDF) paint is an available upgrade option. PVDF coatings keep gloss and hue longer in high-sun-exposure applications and help new additions perfectly match original buildings years later.

Why Steel Matters in a Post-Frame Building

When you hear terms like 29-gauge, heat-treated, or high-tensile steel, they may sound technical, but each one contributes directly to how your post-frame building performs and lasts.

29-Gauge Thickness

A 29-gauge panel strikes the right balance between strength, flexibility, and efficiency for most Midwest agricultural, commercial, and community uses. It’s thick enough to handle wind, impact, and everyday wear without adding unnecessary weight, making it a practical, cost-effective choice for many post-frame projects.

Meyer Building also offers 26-gauge steel as an upgrade option for customers who want added dent resistance, durability, and peace of mind in extra-demanding or unique use cases. In many Midwest post-frame applications, 29-gauge panels deliver the durability, weather protection, and clean appearance you need without added cost or weight.

Heat-Treated, Full-Hard Steel

Heat-treating and full-hard processing increase the hardness of the steel, which improves its rigidity and dent resistance. This means panels hold their shape better under load, stay straighter over time, and resist the small dings that can happen during installation or weather events.

High-Tensile Strength (80,000 PSI Minimum)

Tensile strength measures how much force a material can withstand before it deforms. At a minimum of 80,000 PSI, this high-tensile steel provides exceptional structural integrity and resistance to bending or warping under pressure, from heavy snow loads, wind gusts, and daily stress.

SMP (Silicone-Modified Polyester) Paint Coating

SMP coatings are Meyer Building’s preferred standard for post-frame steel paint. They offer a durable finish that resists scratching and weathering while providing strong UV protection. Though less fade-resistant than PVDF, SMP coatings still deliver excellent performance and long-term value in most climates.

Kynar 500® (PVDF) Paint Coating

Kynar 500® holds its gloss and hue even after years of sun exposure, so the building maintains a like-new appearance far longer than panels with standard paint systems. If future expansion is a possibility for your building down the line, we recommend Kynar 500® paint for consistency and uniformity between the original structure and the building addition.

McElroy Metal Kynar on Building Addition

Post-Frame Steel FAQs

What does steel gauge mean, anyway?

The gauge refers to the steel’s thickness, with lower numbers indicating thicker steel. Most post-frame builders will offer 29- or 26-gauge steel. It’s helpful to know that not all steel panels are equally constructed. Some suppliers’ steel panels are at at the thin end of the allowable range, and may include the paint layer in the measurement rather than just the steel substrate. 

Does thicker steel automatically mean better quality?

Not necessarily. While thicker panels can add weight, the real indicator of quality is tensile strength—how much force the steel can take before it bends or dents. A well-made 29-gauge panel with high-tensile, heat-treated steel can outperform a thicker panel made from softer material.

What makes 29-gauge steel a good choice?

It’s engineered to balance strength and efficiency. 29-gauge panels are thick enough to stand up to wind, snow, and impact, but light enough to avoid putting stress on the framing system—ideal for large spans and agricultural or commercial applications.

How long do steel panels last?

With high-tensile, heat-treated steel and durable factory coatings, properly installed post-frame panels can last for decades. When maintained and kept free of debris, their strength and finish protect the structure far longer than many traditional materials.

Why focus on tensile strength instead of just gauge?

Tensile strength (measured in PSI) tells you how much pressure the steel can withstand before deforming. Our panels meet or exceed 80,000 PSI, which means they’re engineered to stay straighter and last longer under the demands of wind, snow, and temperature swings.

What kind of warranty protection is included?

The steel we use from McElroy Steel comes with a non-prorated, labor-inclusive warranty that covers both material performance and finish durability. We walk you through the details so you know exactly how your investment is protected from the start.

The Bottom Line: Meyer Building is a Top Choice for High-Quality Steel

Steel defines how your post-frame building stands the test of time. With premium 29-gauge panels, high-tensile strength, and durable paint finishes, you get the lasting protection and polished look your investment deserves. McElroy Metal’s proven materials offer dependable performance and color options, while Meyer Building brings it all together with craftsmanship.

Let’s talk about what you’re planning. Call (260) 565-3274 or connect with Meyer Building online to start planning a post-frame commercial building built to perform for decades.

Fertilizer Storage Building vs Fabric Structure for Midwest Farms

Fertilizer Storage Building vs Fabric Structure for Midwest Farms

Fertilizer isn’t cheap, and poor storage conditions can mean clumping, lost volume, extra labor, or even compliance issues. That’s why many farmers compare a fertilizer storage building vs fabric structure. Both get the product under shelter, but they serve different needs. The best option depends on how much fertilizer you move, how long you plan to use the facility, and whether you want a short-term fix or a structure that can grow with your farm.

fertilizer storage building interior

Permanent Post-Frame Fertilizer Storage Buildings

Permanent post-frame fertilizer storage buildings are engineered for high-volume, long-term use. Farmers who move a lot of fertilizer each season often pick this option for its durability, flexibility, and ability to keep fertilizer usable year after year.

Advantages

Durability

Concrete walls and Sturdi-Wall Plus brackets in conjunction with a footer-foundation resist fertilizer’s corrosive environment. By design, these buildings stand up to loaders, conveyors, and repeated traffic without walls bowing out or posts breaking down.

Moisture Control

Ventilation systems such as ridge vents and fans can be tailored to hold humidity in check. Insulated envelopes prevent condensation from forming on tanks and walls—a common source of contamination and clumping in lesser setups.

Operational Efficiency

Clear-span interiors give loaders and conveyors space to work. Wide doors and drive-through bays simplify bulk deliveries and loading. Custom builders can plan layouts for safe traffic flow and staging areas that save time during the busy season.

Flexibility for Growth

Permanent structures allow for expansion or reconfiguration as acres increase. Some farmers later repurpose them for machinery or crop storage, stretching their value across multiple decades of service.

Compliance-Ready

Custom post-frame buildings can be engineered to meet Indiana and Ohio fertilizer storage regulations from the start, avoiding costly retrofits later.

Considerations

Upfront Investment

A permanent fertilizer storage building costs more than a fabric option. But when you spread that cost over 20-30 years, the annual expense is often lower.

Longer Build Timeline

Site preparation, concrete work, and framing take time. Farmers planning to use the building in spring should expect a months-long schedule, not weeks.

Fabric-Covered Fertilizer Structures

Advantages

Lower Initial Cost

Fabric structures cost less to erect. They let farms cover fertilizer without the financial weight of concrete walls and a framed roof.

Fast Installation

Many fabric buildings go up in a matter of weeks. For operations facing a delivery deadline, speed can outweigh other considerations.

Airflow and Light

The translucent fabric allows natural light in and promotes airflow. That helps limit condensation and keeps the dry fertilizer more manageable.

Considerations

Shorter Service Life

Fabric doesn’t hold up as long as wood and concrete. Covers need replacement, and steel frames eventually wear down. Over 10–15 years, repair and replacement costs add up.

Weather Exposure

Heavy snow, strong winds, or accidental tears can shorten the structure’s life. Farmers in the Midwest often report cover damage after harsh winters.

Corrosion Still a Threat

Even under fabric, you still need a durable containment floor. Fertilizer dust and moisture will attack steel fasteners and framing just as aggressively as in other environments.

Compliance Challenges

In Indiana, the Office of Indiana State Chemist and Seed Commissioner (OISC) states that once you store more than 2,500 gallons in a single tank or 12 tons of dry, containment and pad requirements apply. According to the Ohio’s Department of Agriculture, in Ohio, more than 5,000 gallons of liquid stored for 30+ days requires engineered containment and API-rated tanks. Retrofitting a fabric setup to meet those standards can be costly.

Meyer Building’s Approach

Meyer Building helps farmers across northern Indiana and Ohio weigh these choices and plan facilities that balance cost with long-term durability. Our designs include:

  • Materials that resist fertilizer’s corrosive effects

  • Custom ventilation systems to control humidity and keep product flowing

  • Clear spans and drive-through bays that improve traffic flow and save time at transfer

  • Compliance and permitting, so you can focus on running your operation while we handle state requirements

We design and build for decades of service, so your facility is ready for today’s compliance standards and tomorrow’s growth.

Looking Beyond Initial Cost

When comparing fertilizer storage building vs fabric structure, think about the first five years versus the next twenty. Fabric will get you covered quickly and for less money up front, but the replacement cycle and weather risks add cost over time. A permanent building takes longer and costs more at the start, but it gives you lasting protection, efficiency, and compliance confidence that fabric simply can’t match.

Call (260) 565-3274 or contact us online to discuss which fertilizer storage option fits your farm’s needs.

Machine Shed Plans: What to Know Before You Build

Machine Shed Plans: What to Know Before You Build

If you’re searching for machine shed plans, you’re likely trying to figure out the best layout, size, and features to protect your equipment and keep your operation running smoothly. We’ve helped design hundreds of machine shed buildings across the Midwest, and the most successful ones begin with the right questions, not just a blueprint.

If You’re Starting with Machine Shed Plans, Start Here

The most common mistake in shed planning is underestimating the size of today’s and tomorrow’s equipment. Machines are getting taller, longer, and wider. The equipment lineup that fits your operation today may change within five years, and your building needs to keep up.

Key considerations:

  • Combine height and sprayer booms: Plan for at least 16- to 20-foot wall height with 6 to 12 inches of clearance above your tallest equipment.
  • Header width and turning radius: Interior layouts should allow movement without having to shuffle machines around.
  • Semi-truck or grain trailer storage: Drive-through bays or side-by-side parking options reduce wasted time and space.

Designing to fit your current fleet with additional clearance often costs less than modifying a building later.

Avoiding Traffic Jams Inside the Shed

A good layout doesn’t just store equipment; it improves your workflow. Poorly laid-out machine shed plans often lead to tight maneuvering, wasted fuel, and even equipment damage.

What to plan for:

  • Drive-through bays: Simplify entry and exit for large equipment.
  • Wide doors and open interiors: Reduce bottlenecks, especially during planting or harvest seasons.
  • Tool access and work zones: Keep clear space for inspections, light maintenance, or fueling without moving everything.

If you plan to store seed, tools, or chemical totes, make room in the design for that storage without sacrificing usable floor space.

Getting the Right Doors 

Doors are one of the most-used parts of any farm building, and they’re often overlooked in early planning. Size, type, and placement all impact how functional your shed will be.

Common door options:

  • Hydraulic doors: Great for large, unobstructed openings.
  • Overhead doors: Easy to operate for daily access.
  • Sliding doors: Traditional and cost-effective, but slower and more hands-on.

Placement tips:

  • Use endwall doors when you want full building-width access.
  • Sidewall doors can divide zones or provide extra access points.

Take time to match your door choices to how your equipment flows through the building. You’ll use them hundreds of times each year.

Moisture, Condensation, & Insulation

Condensation is a silent problem in machine sheds. It leads to rust, corrosion, and damage to electrical systems. Whether or not you plan to heat the building, your machine shed plans should include proper ventilation—and, in some cases, insulation.

Recommended strategies:

  • Uninsulated shed: Install a condensation control membrane under the metal roofing to stop drips from forming on cold mornings.
  • Insulated shed: Do not use a condensation membrane. Instead, focus on a proper insulation system that includes vapor barriers and ventilation.
  • Ventilation: Include ridge vents and soffit openings to move moist air out and reduce condensation.

If you’re storing high-value equipment or anything electronic, insulating your machine shed with the right wall and ceiling assemblies adds long-term protection.

Why Custom Machine Shed Plans Make a Difference

Cost is often the first number you look for, but it rarely tells the full story. The real value and the real cost depend on what is included beyond the basic frame and panels.

Here’s what is often not fully accounted for in off-the-shelf or downloadable plans:

  • Size and structure: Wider clear spans or taller sidewalls require additional materials and engineering. Generic plans may not reflect the design adjustments needed for your specific site or equipment.
  • Doors: Hydraulic and overhead doors are higher-cost components that greatly improve functionality but are not always included in plan estimates.
  • Foundation system: Many kits or plans rely on treated wood posts or basic concrete pads, while Meyer Building installs Perma-Column® permanent concrete foundations that improve longevity and stability.
  • Electrical and lighting: Plans may show layout ideas but do not typically include wiring, conduit runs, or lighting design.
  • Site prep and permits: Every site has unique grading, utility, and zoning requirements. These costs vary widely by county and are often left out of plan-based estimates.

Farmers often come to us after struggling with pre-built or kit-style buildings. Machine shed plans can be a useful starting point, but they rarely anticipate your actual site conditions or usage needs. A Meyer Building design includes those real-world details from the start, helping you plan more accurately and build a shed that performs better and lasts longer. 

Let’s Talk Through Your Machine Shed Plans

You may have landed here looking for machine shed plans, and hopefully, now you’re thinking even more about what your farm needs. A well-designed shed protects your investment, saves labor, and keeps your operation moving when every hour counts.

Meyer Building has decades of experience building for Midwest farmers. We don’t sell kits or push one-size-fits-all layouts. We work with you to design a machine shed that fits your farm, your fleet, and your future.

Ready to start planning? Connect with Meyer Building and we’ll talk through your ideas, no pressure.

Common Questions About Machine Shed Plans

How much does a machine shed cost?

Basic machine shed shells may start around $25–$35 per square foot. Final cost depends on size, doors, foundation, and finishes.

Can I prep my own pad?

Yes. Meyer Building does not require you to use our services for pad preparation.

Do I need insulation in my machine shed?

Not always. If you’re not heating the shed and moisture isn’t a major concern, it may not be needed. But insulation improves protection and reduces corrosion over time.

Can I expand my machine shed later?

Yes, if the design allows. Planning for expansion during the initial build is more affordable than modifying a completed structure.

What permits do I need to build?

Most counties and townships require building permits, and some also require zoning approval. We help you through the process.

What’s the best door type for farm sheds?

It depends on how often you use the door and how wide the equipment is. Hydraulic doors offer convenience and clearance for frequent use of large equipment. Sliding doors are popular for large equipment that don’t need frequent access during the day. Overhead doors work well for frequent access when clearance isn’t a limiting factor.

Pole Barn Insulation & Moisture Control Strategies

Pole Barn Insulation & Moisture Control Strategies

Midwest heat, humidity, and deep-freeze winters put buildings to the test. Pole barn insulation helps by reducing cold surfaces where condensation can form, but real moisture control also depends on good ventilation and air sealing. Together, these measures protect equipment and keep your insulated workshop building comfortable.

Pole Barn Insulation Questions Midwest Farmers Ask

“Will my insulated shop ‘sweat’ like a cold can in summer heat?”
Condensation forms when warm, humid air hits a colder surface and drops water. In post-frame pole barns and workshops, that often means warm inside air hitting a cold roof panel or hot, humid outside air rushing into a cooled space. The fix includes reducing cold surfaces, controlling indoor humidity, and sealing air leaks so moist air can’t sneak into cold cavities.

“What about drafts and comfort?”
Enhanced comfort begins with air sealing. Drafts waste heat, pull in moisture, and make heaters feel useless. Seal the leaks first so your insulation can perform, and every BTU you pay for sticks around longer.

“Spray foam or fiberglass insulation?”
Either can work when your builder designs the assembly right. Fiberglass batts deliver cost-effective R-value, but require air sealing and a proper vapor strategy to avoid moisture traps. Closed-cell spray foam creates an excellent air and vapor barrier at adequate thicknesses.  Farmers can use either in addition to house wrap and a vapor barrier, or employ a hybrid approach—a layer of closed-cell foam to seal and control vapor, plus fiberglass to further boost R-value.


Pole Barn Insulation Strategies with Moisture Control in Mind

Walls

Meyer Building’s standard wall insulation strategies improve comfort and help reduce condensation when paired with proper ventilation and vapor control.

A proven approach begins with installing a barrier layer of house wrap on the exterior that lets the wall dry outward. Setting R19 or R25 fiberglass batts in the wall cavities delivers dependable R-value for cost-effective comfort gains. Finishing with an interior Visqueen vapor barrier adds another layer of protection blocking interior vapor from reaching cold metal.

For workshop and pole barn insulation with enhanced air sealing or higher R-values and heat-flow resistance, there are upgraded wall assembly options available.

Choosing up to 5 inches of open-cell spray foal in the walls can maximize air sealing for a robust R-value without fiberglass batts.

A hybrid approach can add 1 to 2 inches of closed-cell spray foam insulation to the post-frame walls to close gaps, stiffen the assembly, and reduce vapor movement before filling the assembly with fiberglass batts. This combination delivers the best of both worlds: a tight, durable shell and cost-effective insulation depth.

Ceilings

You can experience the most significant comfort gains by prioritizing your post-frame building’s lid. 

Rather than spray foam, Meyer Building’s standard ceiling insulation strategy is to use 10 inches of R38 blown-in cellulose and a continuous Visqueen vapor barrier on the warm side. That combination traps heat where you need it most and keeps interior vapor from drifting into cooler attic spaces and ceiling assemblies. 

Want even more ceiling insulation efficiency? Upgrading the ceiling insulation depth to 12, 14, or 16 inches of cellulose as desired enhances performance, coverage, and serviceability. 


Workshop & Pole Barn Moisture & Condensation Control, Simplified

Pole Barn Roof Ventilation Prevents Condensation

When insulation traps heat, ventilation moves moisture. A continuous soffit intake paired with a continuous ridge vent keeps air flowing under the roof deck so moisture has somewhere to go. If your work adds humidity—from wash bays, snow melt-off, livestock, or intermittent heating—consider mechanical exhaust or a dehumidifier. Think “predictable airflow,” not “crack a window and hope for the best.”

Air Sealing for Better Pole Barn Insulation Performance

Overhead doors, man doors, wall-to-slab joints, and service penetrations create small pathways that add up to major loss. Weatherstrip, caulk, and foam every interruption in the thermal boundary. Many little pinholes equal one big leak.

Managing Ground Moisture in Insulated Pole Barns

Moisture doesn’t just blow in from outside air. It wicks up from the ground below, too. Persistent slab “sweat” in spring and fall often improves with air circulation and intermittent dehumidification, while a perimeter grade beam can help manage ground moisture at the slab edge. It ties your columns together, keeps wood and steel out of the splash zone, and gives door thresholds and base trim a dry, solid bearing. Where needed, slab-edge insulation can help cold-edge condensation. A positive grade away from the building, and drain tile if soils stay wet, will help keep the edge dry year-round.

Avoid Double Vapor Barriers in Pole Barn Insulation

Pick one primary vapor control layer. For example, if you use closed-cell spray foam at sufficient thickness, skip interior poly sheeting. “Sandwiching” insulation between two barriers can trap moisture where you can’t see it.


Pole Barn Insulation FAQs: Farmers’ Common Concerns

Q: What’s the “best” insulation for pole barn or workshop walls?
A: The best insulation is the assembly that fits your post-frame building’s use. A solid starting point includes installing house wrap outside, R19 or R25 fiberglass batts in the cavities, and a Visqueen vapor barrier on the interior. A hybrid approach adding open-cell or closed-cell spray foam maximizes sealing and R-value for the best balance of comfort, cost, and moisture control.

Q: Will insulation make my building “sweat?”
A: Not if you air-seal and ventilate correctly. Condensation spikes when warm, moist air touches colder surfaces. Seal the leaks, use one interior vapor barrier, vent the roof, and manage humidity during wash-downs or intermittent heat.

Q: We only heat the workshop when we’re working—any special tips?
A: Yes. Intermittent heat can drive moisture into cold cavities, raising the stakes on air sealing and ventilation. Effective wall and ceiling insulation strategies keep moisture where it belongs and keep you comfortable when you fire up the heat.


Work with Meyer Building for a Moisture-Free Pole Barn Crafted to Thrive

“Built to last” is just our baseline. Your pole barn should thrive for generations with steady comfort, predictable energy costs, and no mystery drips. The right insulation strategy protects both your building and your investment.

Farmers across Northern Indiana and Ohio trust Meyer Building to design insulation systems around their workflow, climate, and budget. We walk the site, talk through intermittent heat or wash-down routines, and recommend the approach that fits your needs.

Ready to design an insulation and condensation-control plan that actually works? Let’s talk about insulated workshops built to thrive. Call (260) 565-3274 to connect with Meyer Building’s pole barn insulation experts or reach out online today to schedule a consultation.